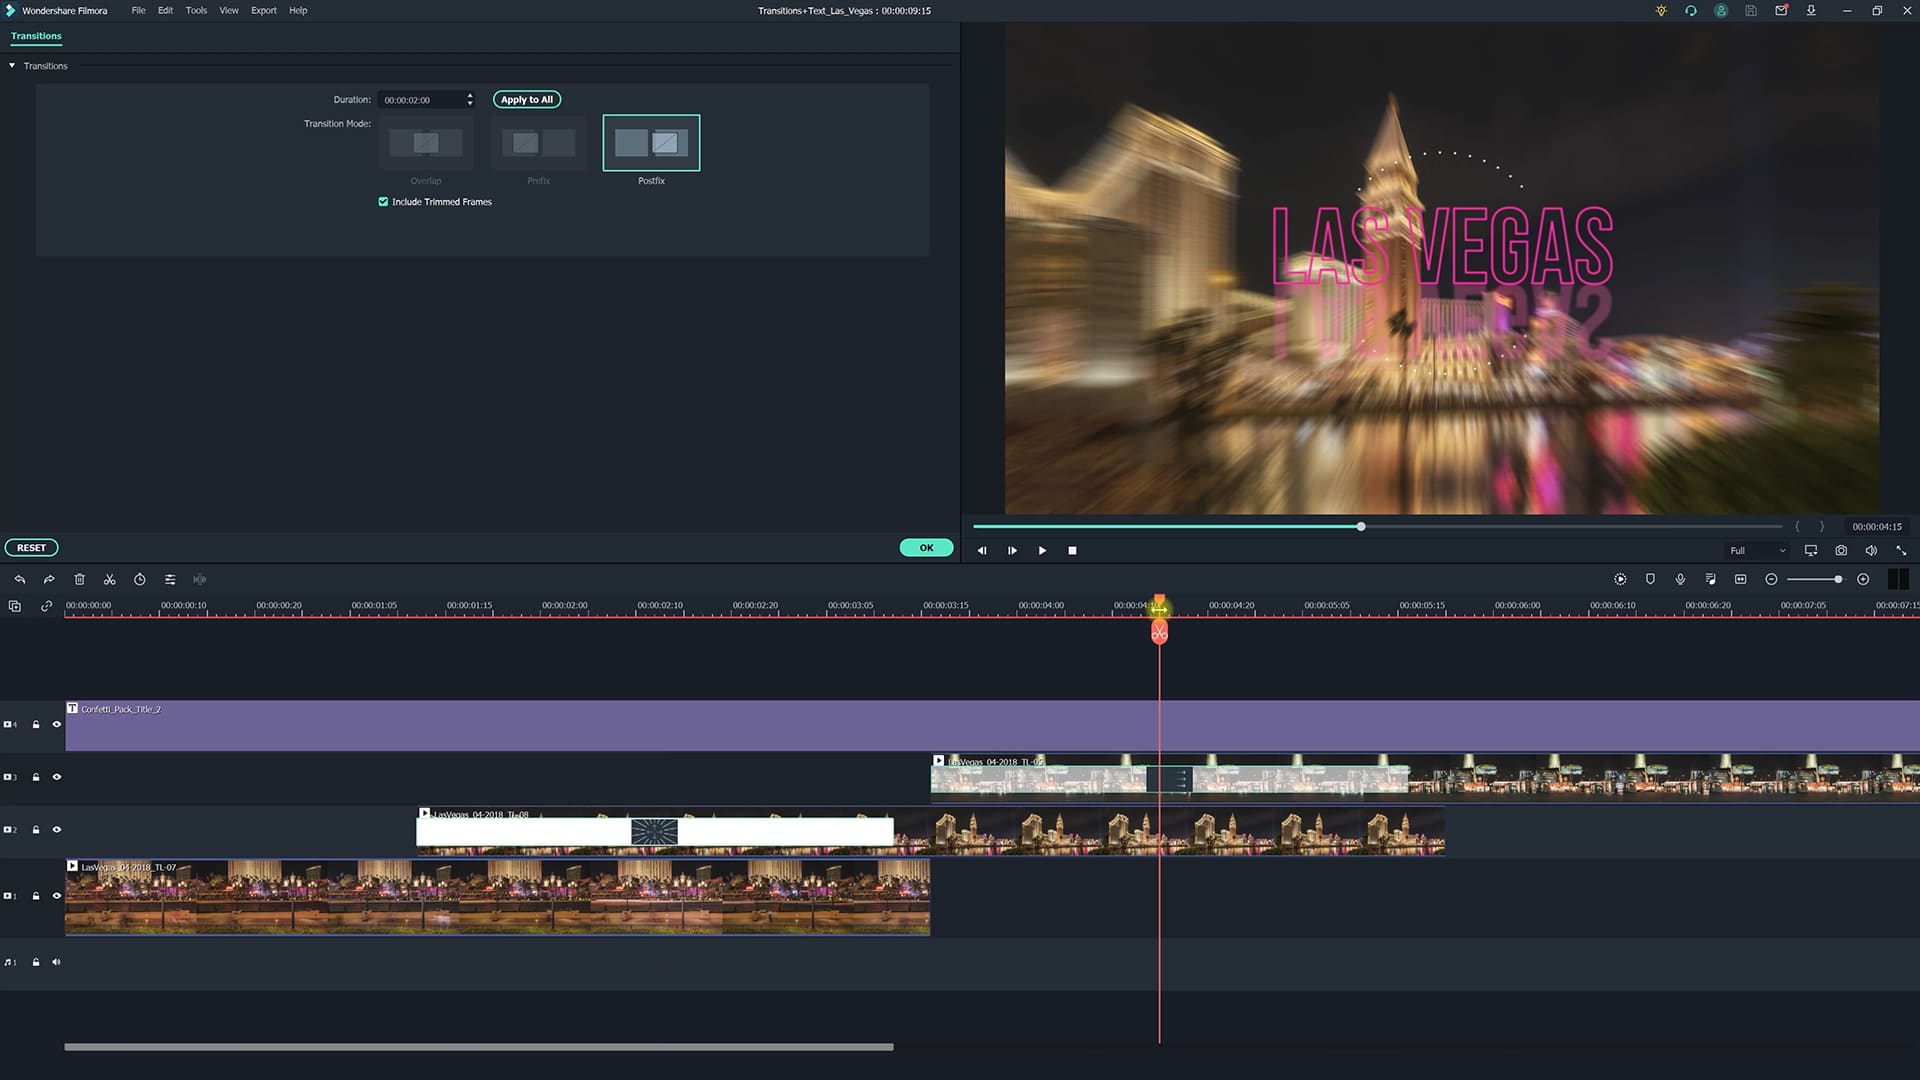
Wondershare Filmora X is a video editing software for beginners and advanced filmmakers. Filmora X has a variety of features including motion tracking, keyframing, color correction, basic animation effects and much more.
User interface and basic settings
The user interface has a standard setup which means on the left are all settings, effects and the media library. On the right side is the playback screen to show the video and the lower half of the screen is displaying the editing timeline.
There are two ways to set up a project. You can either drop a video clip in the timeline and the software will automatically adapt all settings or you can go to “File” and then “Project Settings”.
You can either choose from the resolution presets or type in your own custom resolution. The frame rate can also be set at the bottom of the menu.
The video, audio or photo files can be dropped directly into the timeline after they have been imported. Depending on the project you can add as many video or audio tracks as you need by clicking on the “plus” icon on the left side of the timeline.
To do a simple cut you can either click on the “scissor” icon or press “Ctrl+B” on your keyboard.
When going to “File” and then “Keyboard Shortcuts” you can customize pretty much all settings to any shortcut, which is always useful especially if you are used to working with other software.
Effects
Even though Filmora X isn’t a software aimed at professional video editors it still has a lot of advanced features and effects that can be customized.
The fastest way to access the effects and settings is to go to the “Tools” drop-down menu.
The software has all the necessary presets such as transitions, text animations and titles but also offers a simple green screen tool and speed controls to create a slow motion effect or a timelapse, simply by speeding up or slowing down the footage.
Motion Tracking
A very useful feature is the Motion Tracking that automatically detects the motion in the selected footage and then allows the placement of another video file, a graphic or for example a mosaic effect to blur someone’s face.
First, you need to select the area in the video that should be analyzed, then the software renders for a few seconds and once it’s done you can link another file that should be placed in the video.
Keyframing
The software also offers Keyframing which means motion and effects can be manually adjusted over time. For motion effects, Filmora also offers presets that can be customized to get the best results.
The effect is then being displayed on the clip itself in the timeline. This way you can easily drag the keyframes forwards or backwards to finetune the timing.
Color correction
Important is of course also color correction and grading to get the wanted film look or simply to correct exposure and while balance.
Besides being able to use graded presets to get a specific look, the “Adjust” tab is where it gets interesting. The color temperature can simply be adjusted by dragging the slider to the left or right to get a warmer or colder temperature.
The tint can also be set in case the video is too green or has a magenta shift. Besides standard color and contrast options the software also has an “HSL” setting to fine tune specific colors.
You can also change how the color correction process is being displayed to see a before and after look at all times.
Performance
When looking at the software from a performance point-of-view it’s doing rather well. Of course, the playback speed and overall performance of the software comes down to each computer system.
There are no issues when playing back 4K footage with any standard codec in full resolution. Even H.265 files are handled flawlessly, which is often an issue with professional video editing software.


